 jt-filework
Your hands never leave the keyboard.
One letter is one command — copy, move, rename, view, mark — with nothing to hold down and no menu to hunt through. Underneath it: panes that split as far as the work needs, independent tabs in each, real previews, archives you open like folders, remote folders over SFTP, and a report that says which kind of file filled the disk.
全鍵操作,無需離手。
一個按鍵快速執行命令:複製、移動、更名、檢視、標記。不用組合鍵,也不用翻選單。面板可以一直切下去,每個面板有自己的分頁,預覽是真的預覽,壓縮檔按 Enter 就當成資料夾開,遠端資料夾走 SFTP,磁碟用量會告訴你是哪一類檔案把空間吃掉的。
0.6.63 — runs on macOS, Windows and Linux.
Installers for all three are under Download. They are not signed yet,
so macOS and Windows ask once before opening them; the steps are there too.
823 tests pass.
0.6.63 macOS、Windows、Linux 三個平台都跑得起來。三個平台的安裝檔在下載。目前還沒有簽章,所以 macOS 和 Windows 第一次開啟前會先問一次,步驟也在那裡。823 個測試通過。
What it does
它做得到什麼
Everything here is built and working, not planned. The full specification lists every feature, every format and every limit, with the numbers.
下面這些都做完了、可以用,不是計畫。每項功能、每種格式、每道上限的數字,完整規格裡都查得到。
Split as far as the work needs
要幾個面板就幾個
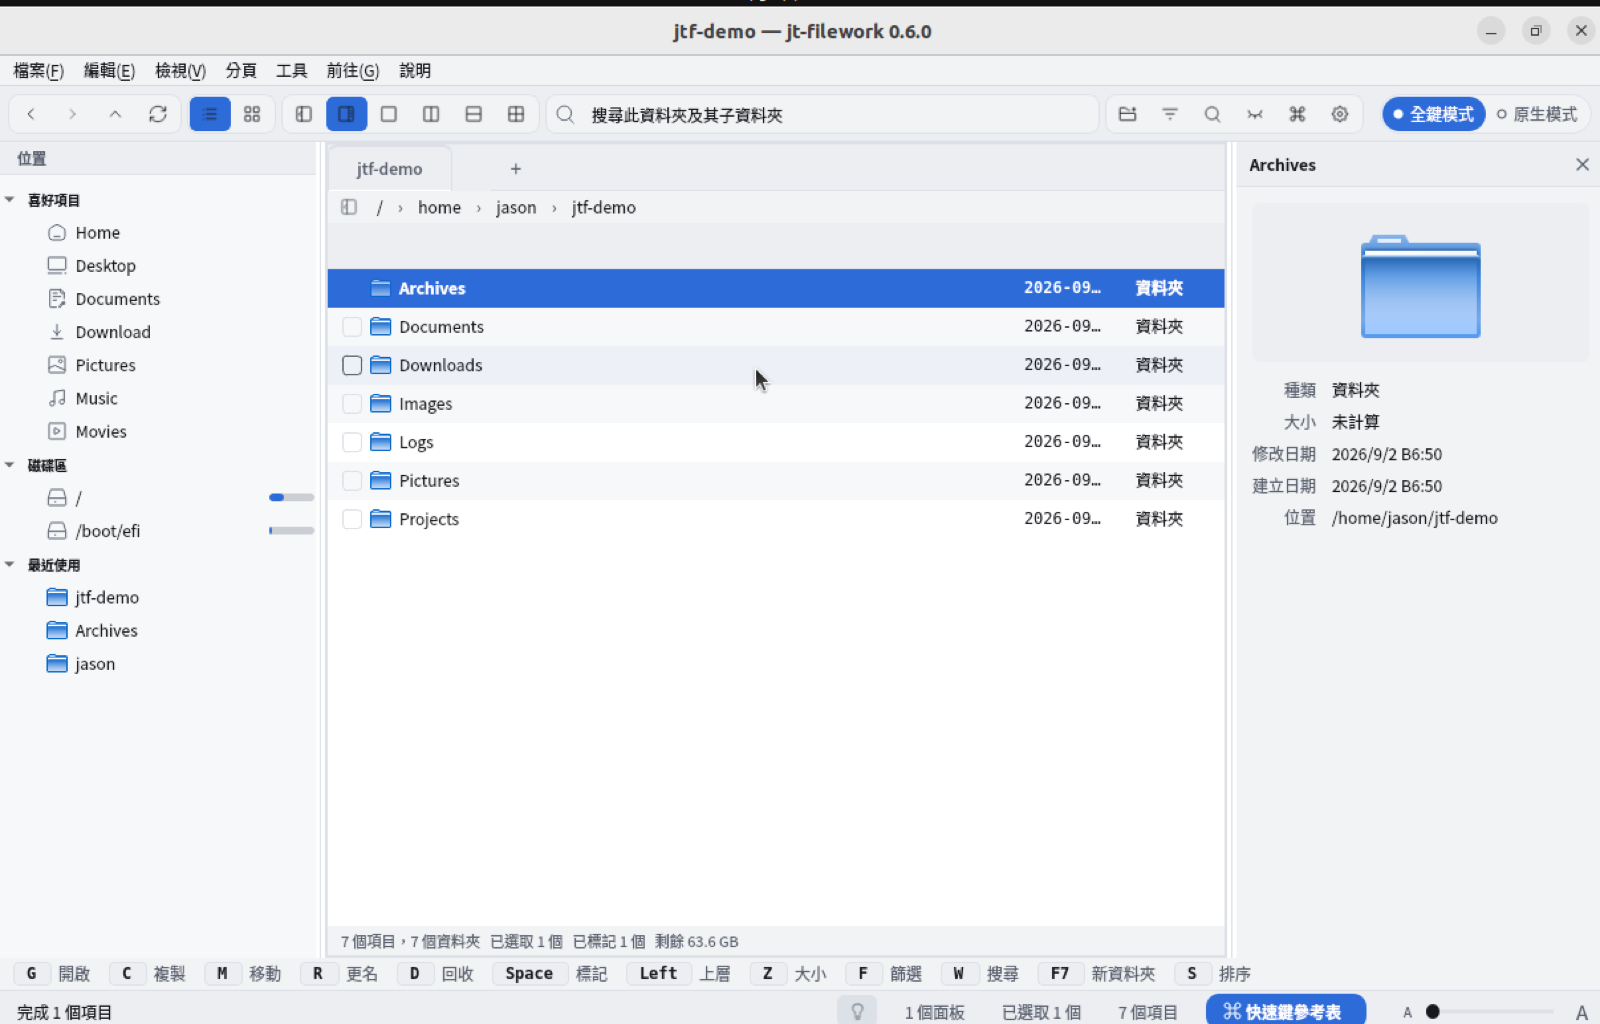
A recursive split tree, not two fixed panes. Every pane owns independent tabs, and a tab can be torn off into its own window.
不是固定兩個面板,要幾層就切幾層。每個面板有自己的分頁,分頁也能拉出來變成獨立視窗。
Where you are, and what you chose
光棒是位置,標記是選擇
The bar follows the arrow keys and the mouse; marks are what you picked with Space, a tick box or Ctrl-click, drawn in a colour of their own. A command acts on the marks, or on the row under the bar when nothing is marked — the way CView does it.
光棒跟著方向鍵和滑鼠走;標記是你用 Space、勾選框或 Ctrl 點選挑出來的,用自己的顏色顯示。命令作用在標記上,什麼都沒標記時就作用在光棒那一列,跟 CView 一樣。
What differs between two folders
兩個資料夾差在哪
Only here, only there, different, identical. Subfolders optional. Compared by size and modification time — a rule printed under the table rather than implied.
只在這邊、只在那邊、不一樣、一樣。要不要含子資料夾自己決定。比對用大小跟修改時間,這條規則就寫在表格下面,不用猜。
Where the space went
空間跑去哪了
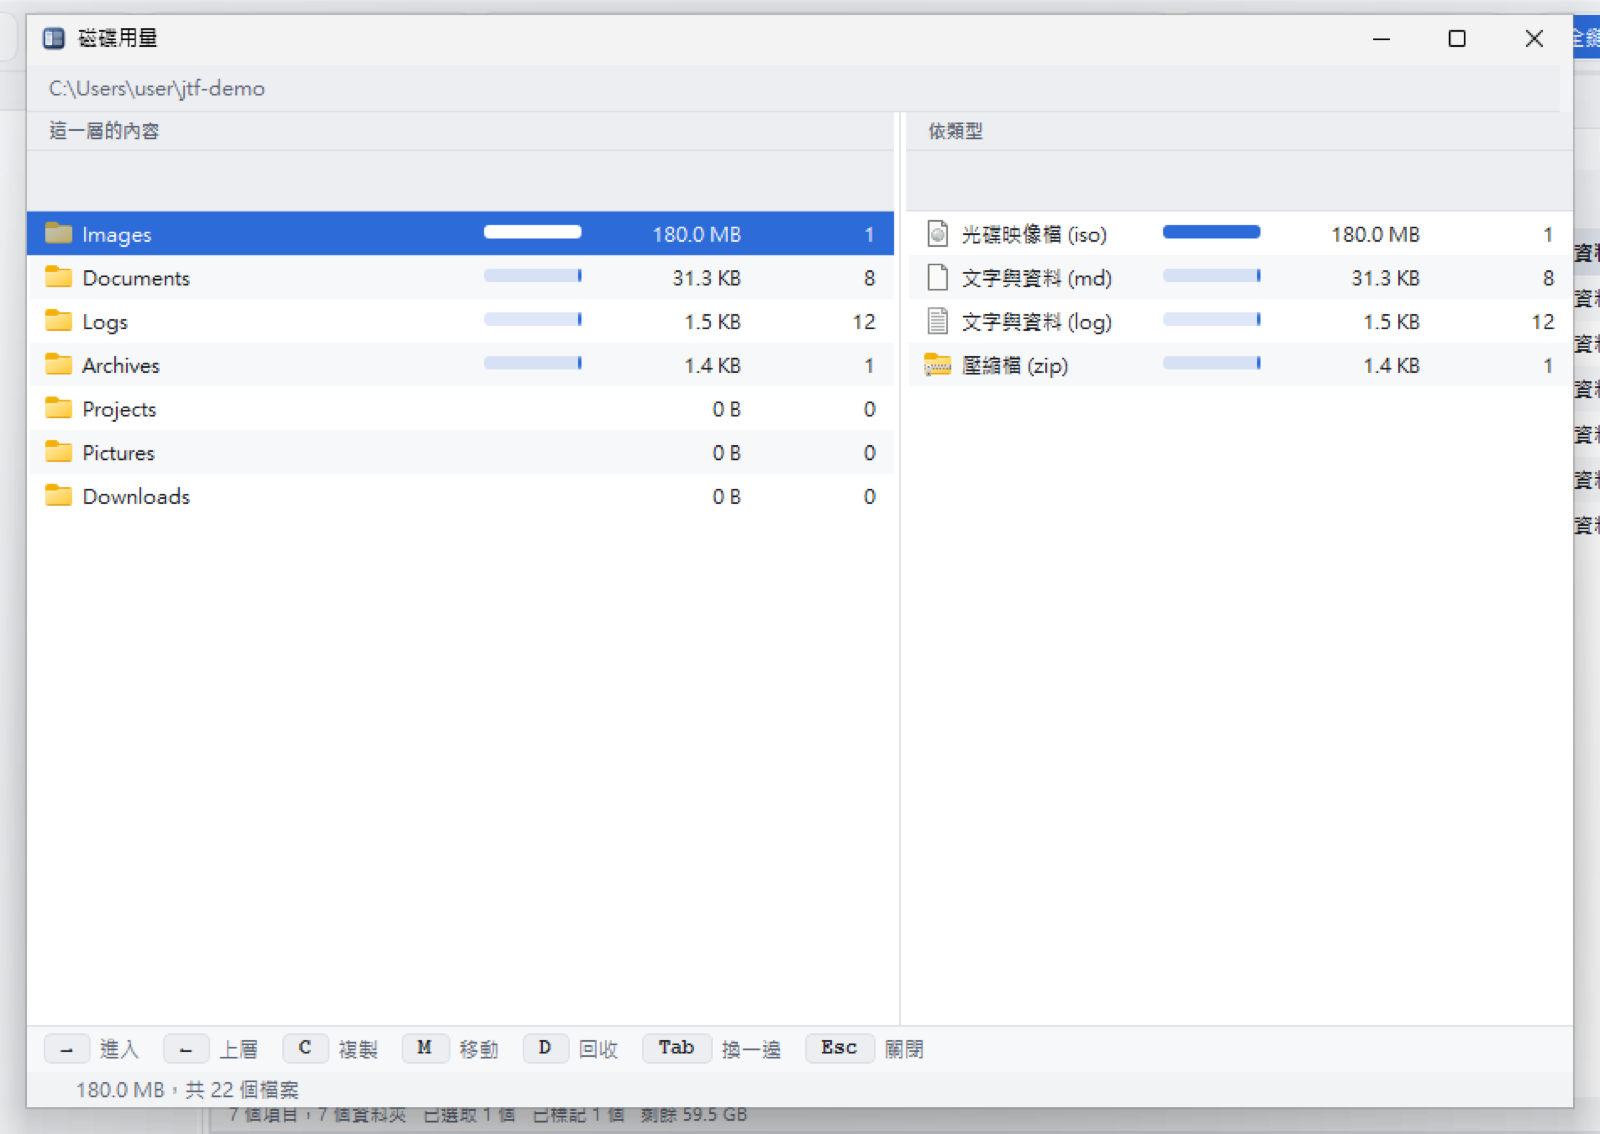
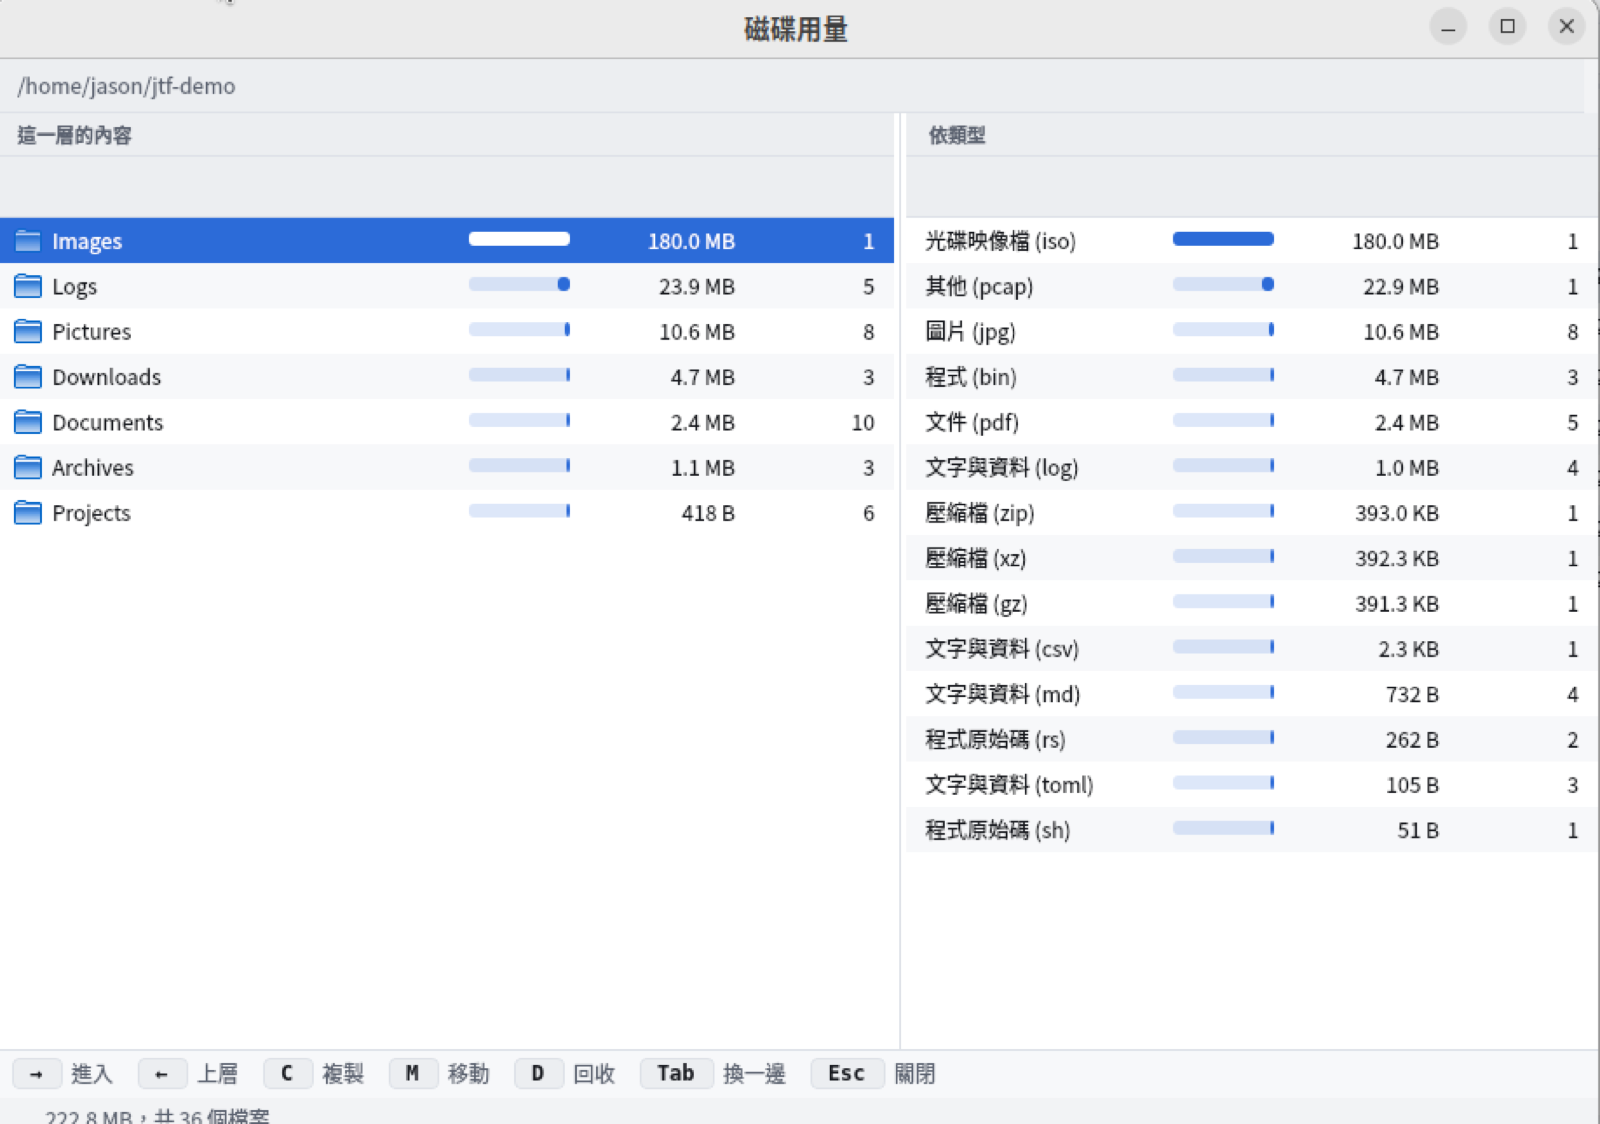
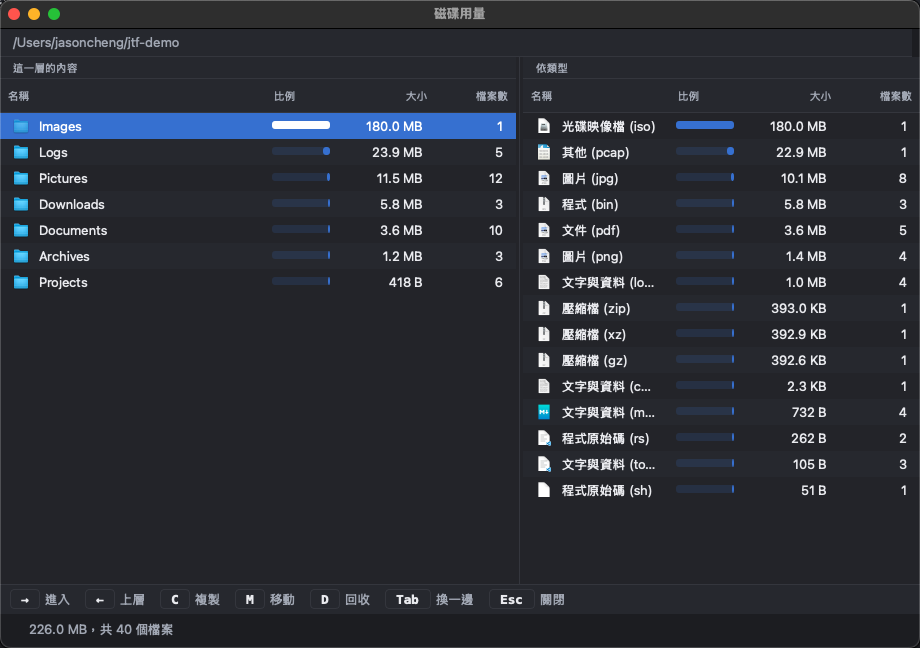
One walk, two answers: which child folder holds the most, and which kind of file adds up to the most. The second is the half most tools cannot answer.
掃一次給你兩個答案:哪個子資料夾最大,還有哪一類檔案加起來最大。第二個答案大部分工具都給不出來。
An image onto a USB stick
把映像檔寫進 USB 隨身碟
Only removable, external disks that are not carrying the running system are ever offered — a disk it could not read does not appear at all. It reads the disk back afterwards, because a failing or counterfeit stick takes every write and returns something else.
只列可移除、外接、而且沒有裝著現在在跑的系統的磁碟。讀不齊資料的那顆根本不會出現。寫完會讀回來核對,因為快壞掉的或是假的隨身碟,寫進去都收,讀出來是別的東西。
Remote folders
遠端資料夾
SFTP with the host key checked and remembered. Copy, move and delete between a server and this machine, and a file only takes its real name once it has all arrived. A password is held in memory only, dropped on disconnect, and never written to disk.
走 SFTP,主機金鑰會檢查也會記住。伺服器跟本機之間可以複製、移動、刪除,檔案要整個傳完才會換上正式的檔名。密碼只放在記憶體,斷線就丟掉,不會寫進磁碟。
The window never stops
視窗不會卡住
Listing, searching, measuring, comparing, extracting — all on worker threads, all with a running count and a Cancel that works.
列目錄、搜尋、計算、比較、解壓縮,全部丟到背景執行緒跑。進度即時更新,取消按了真的會停。
Screenshots
畫面
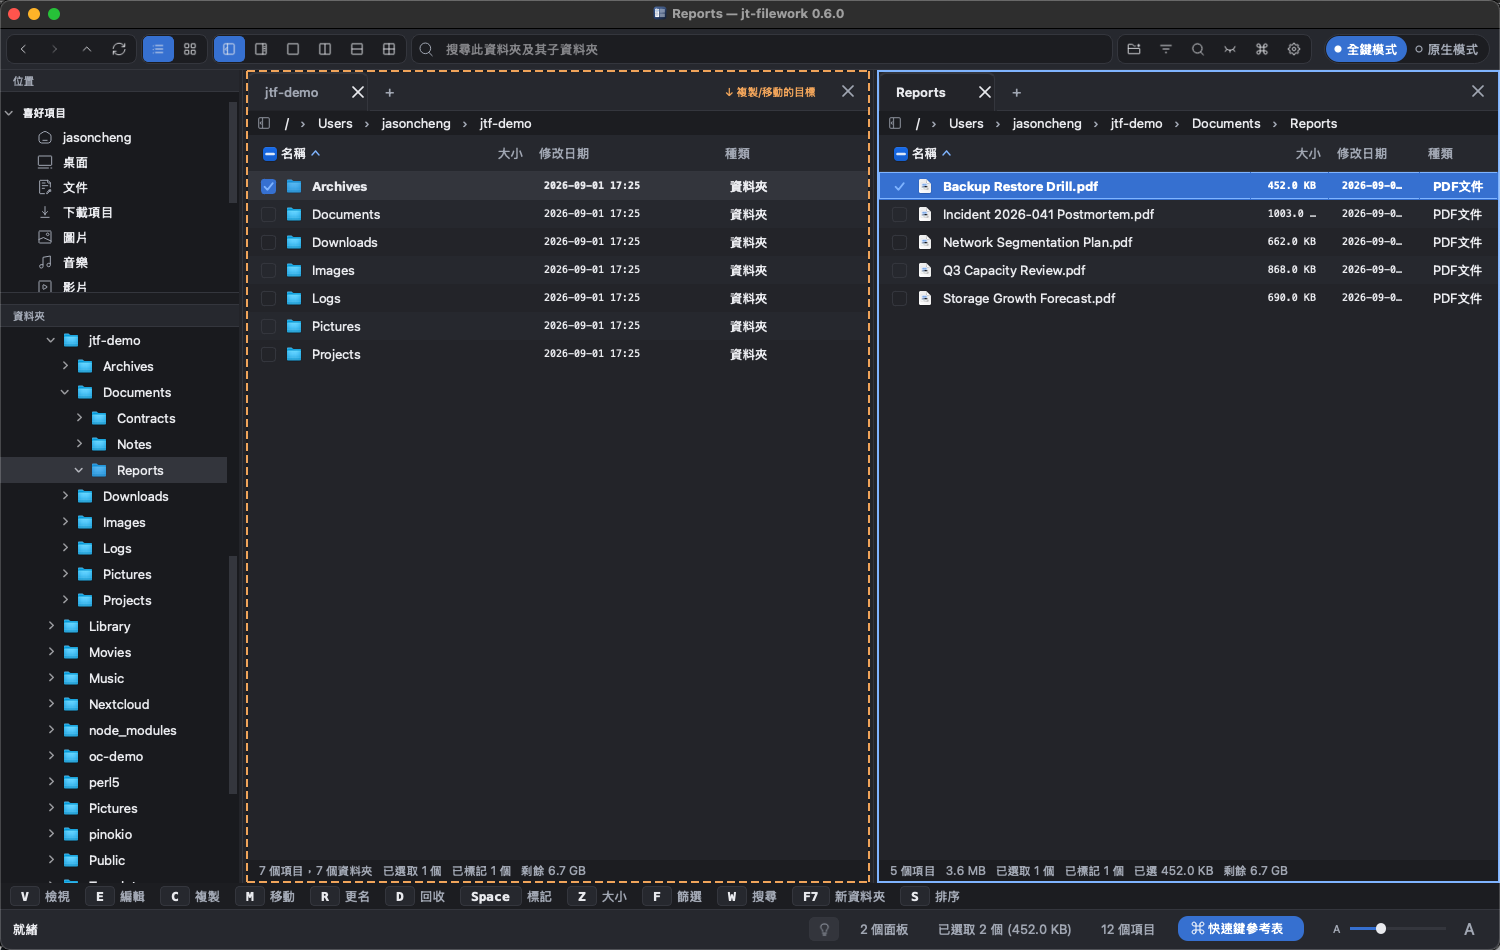
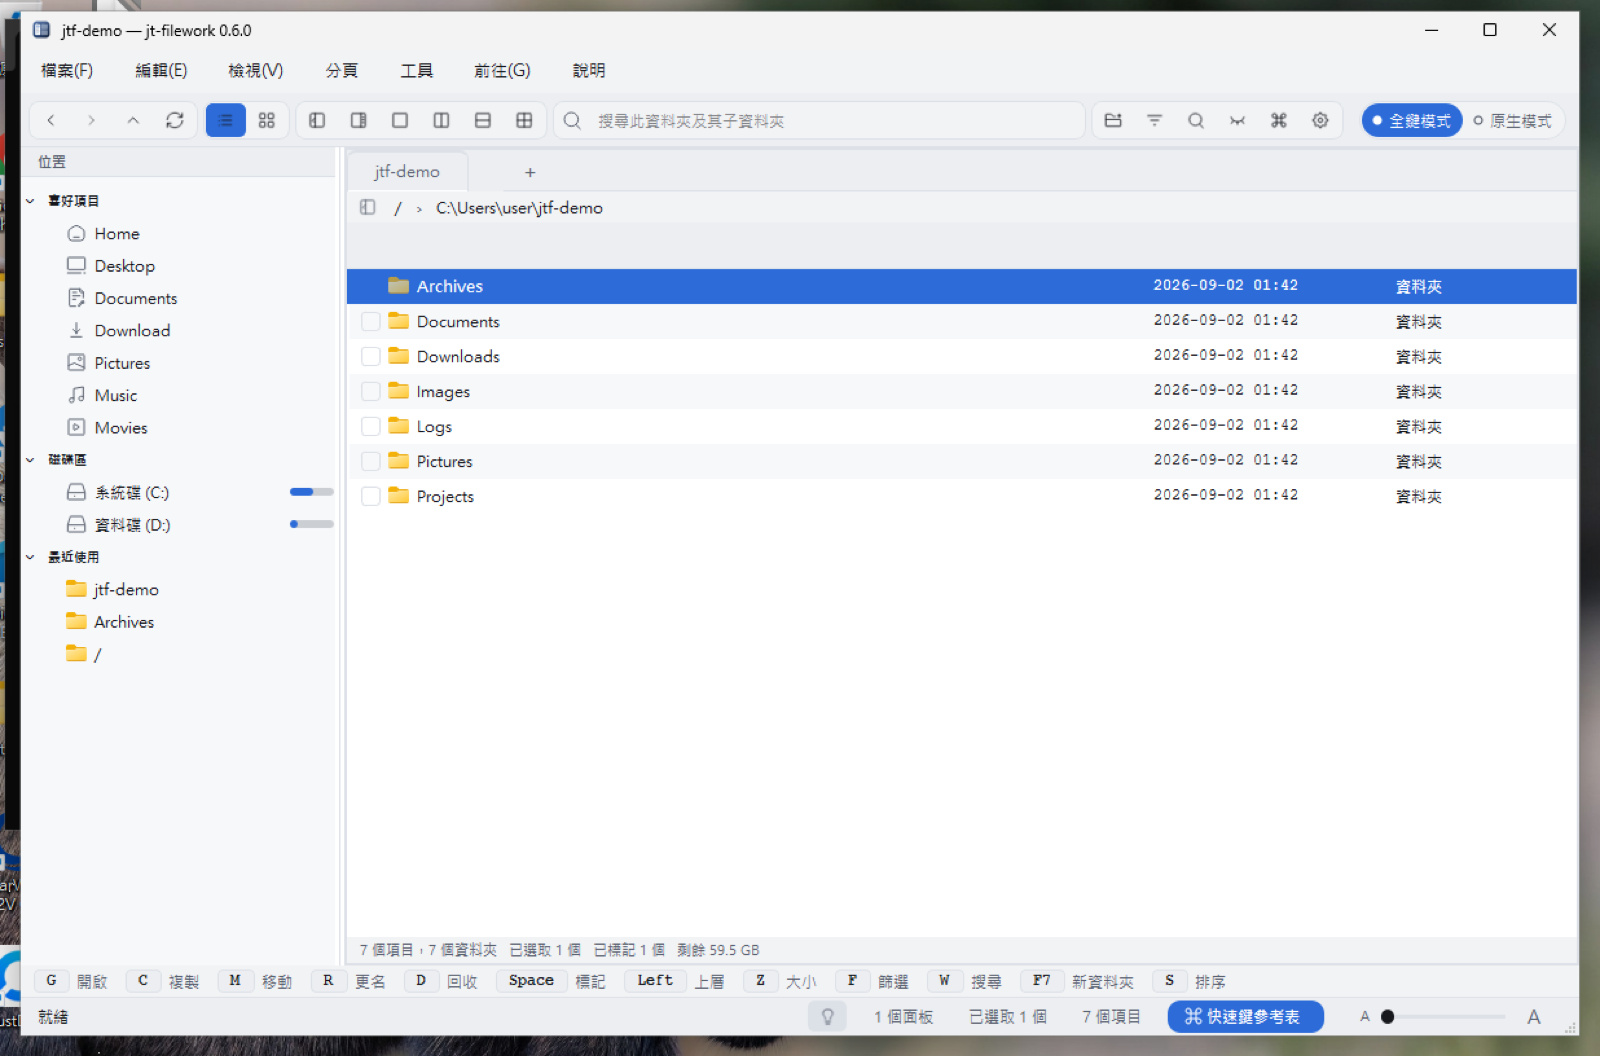
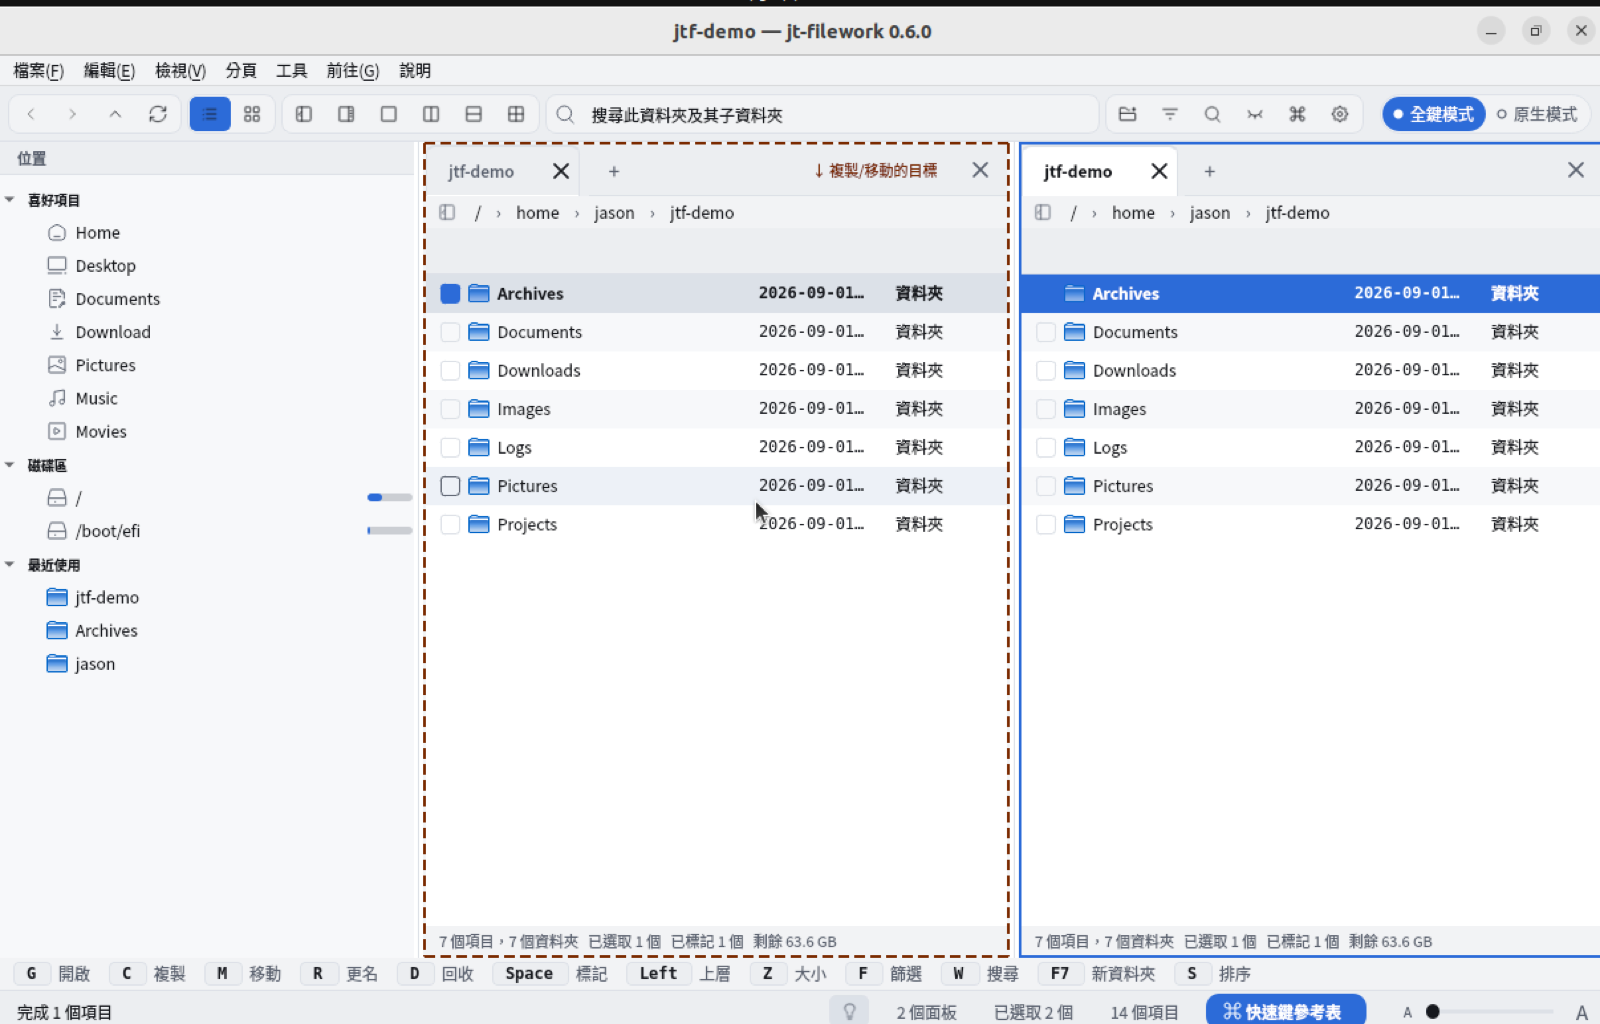
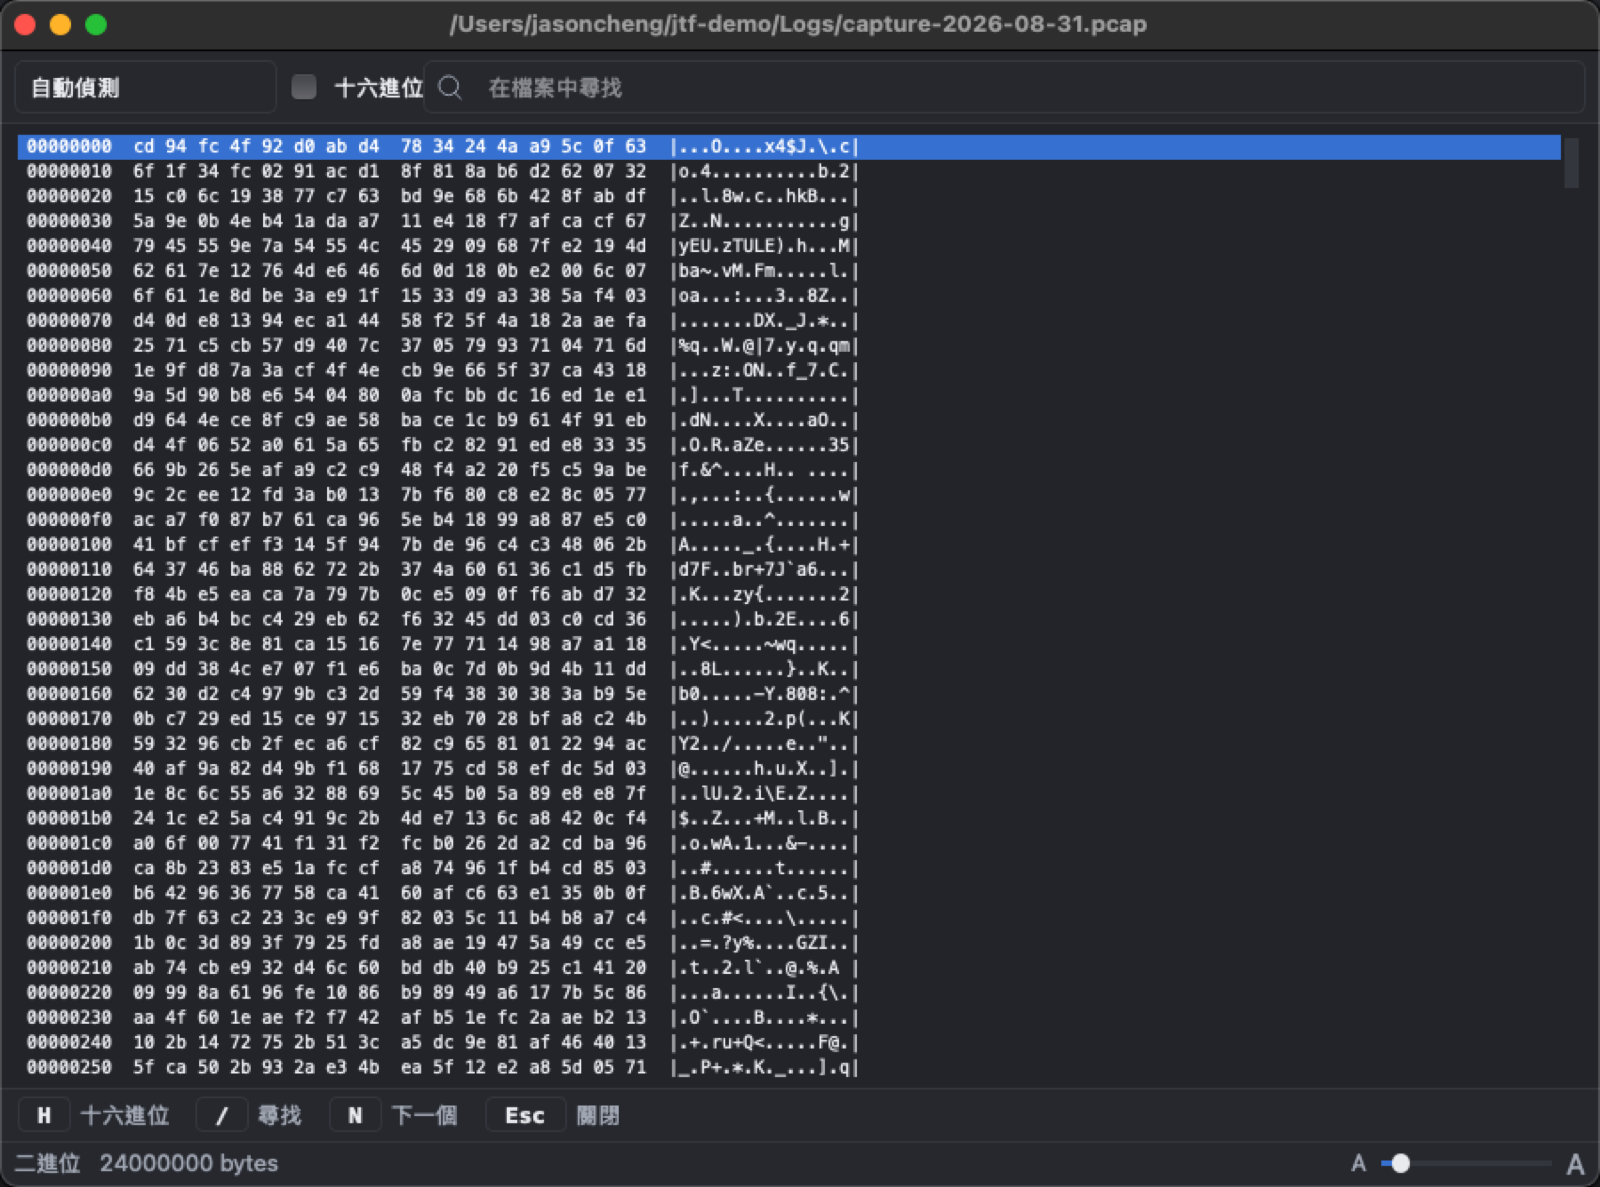
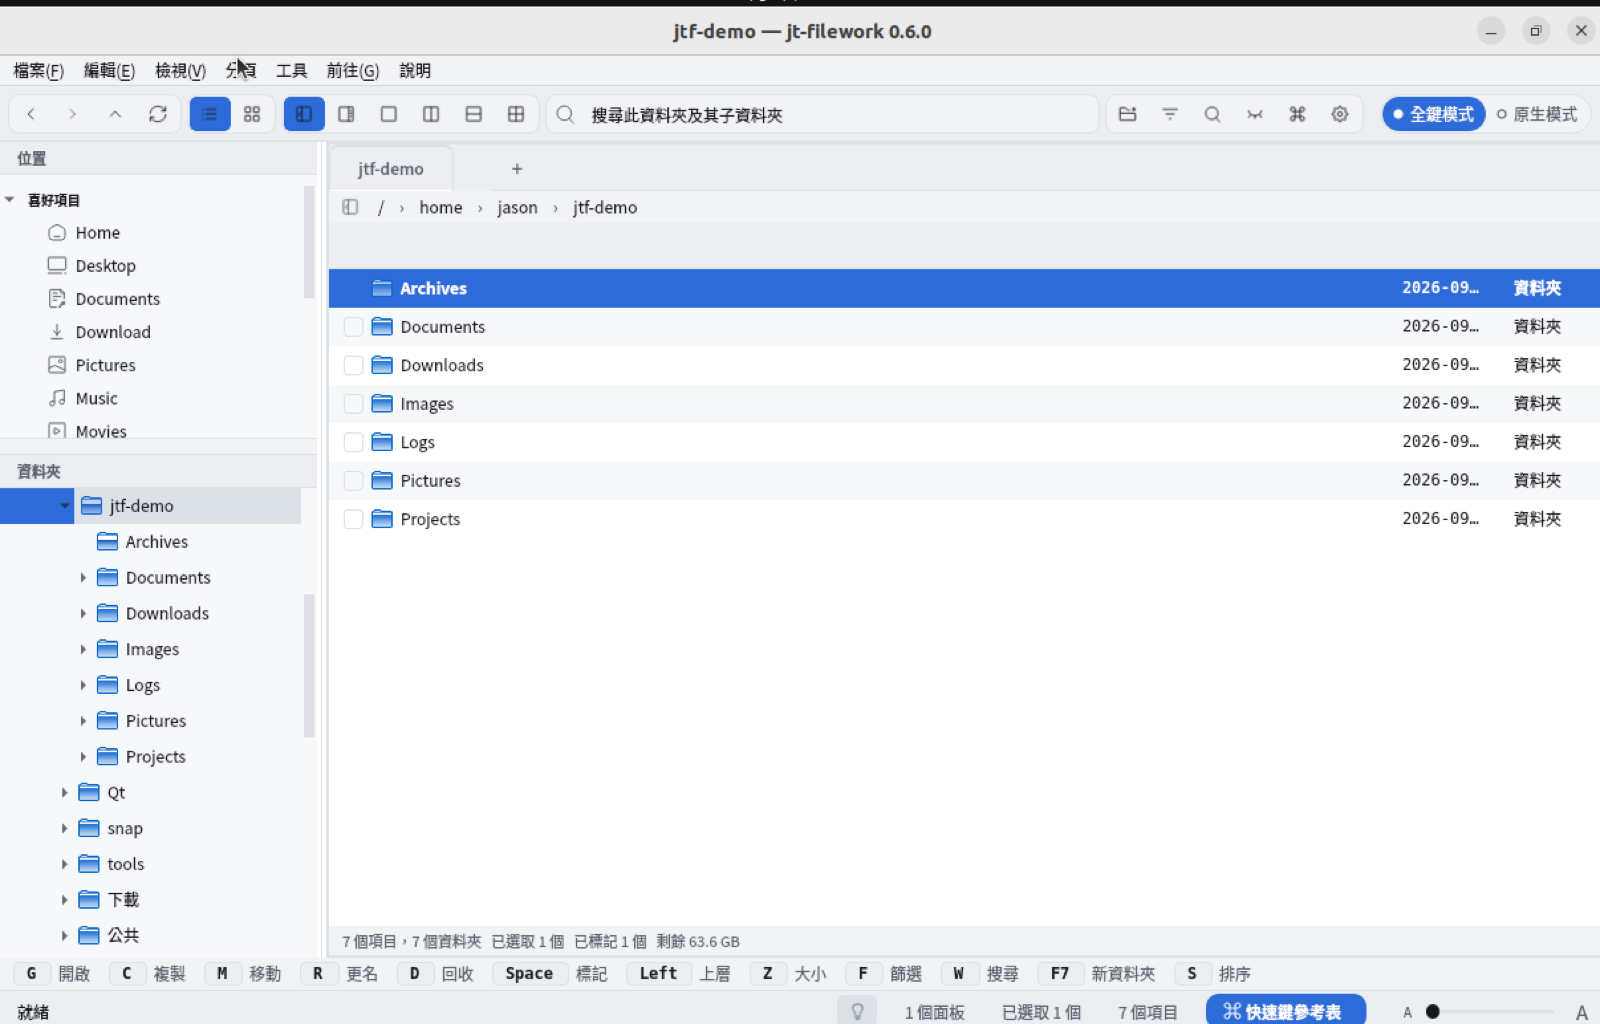
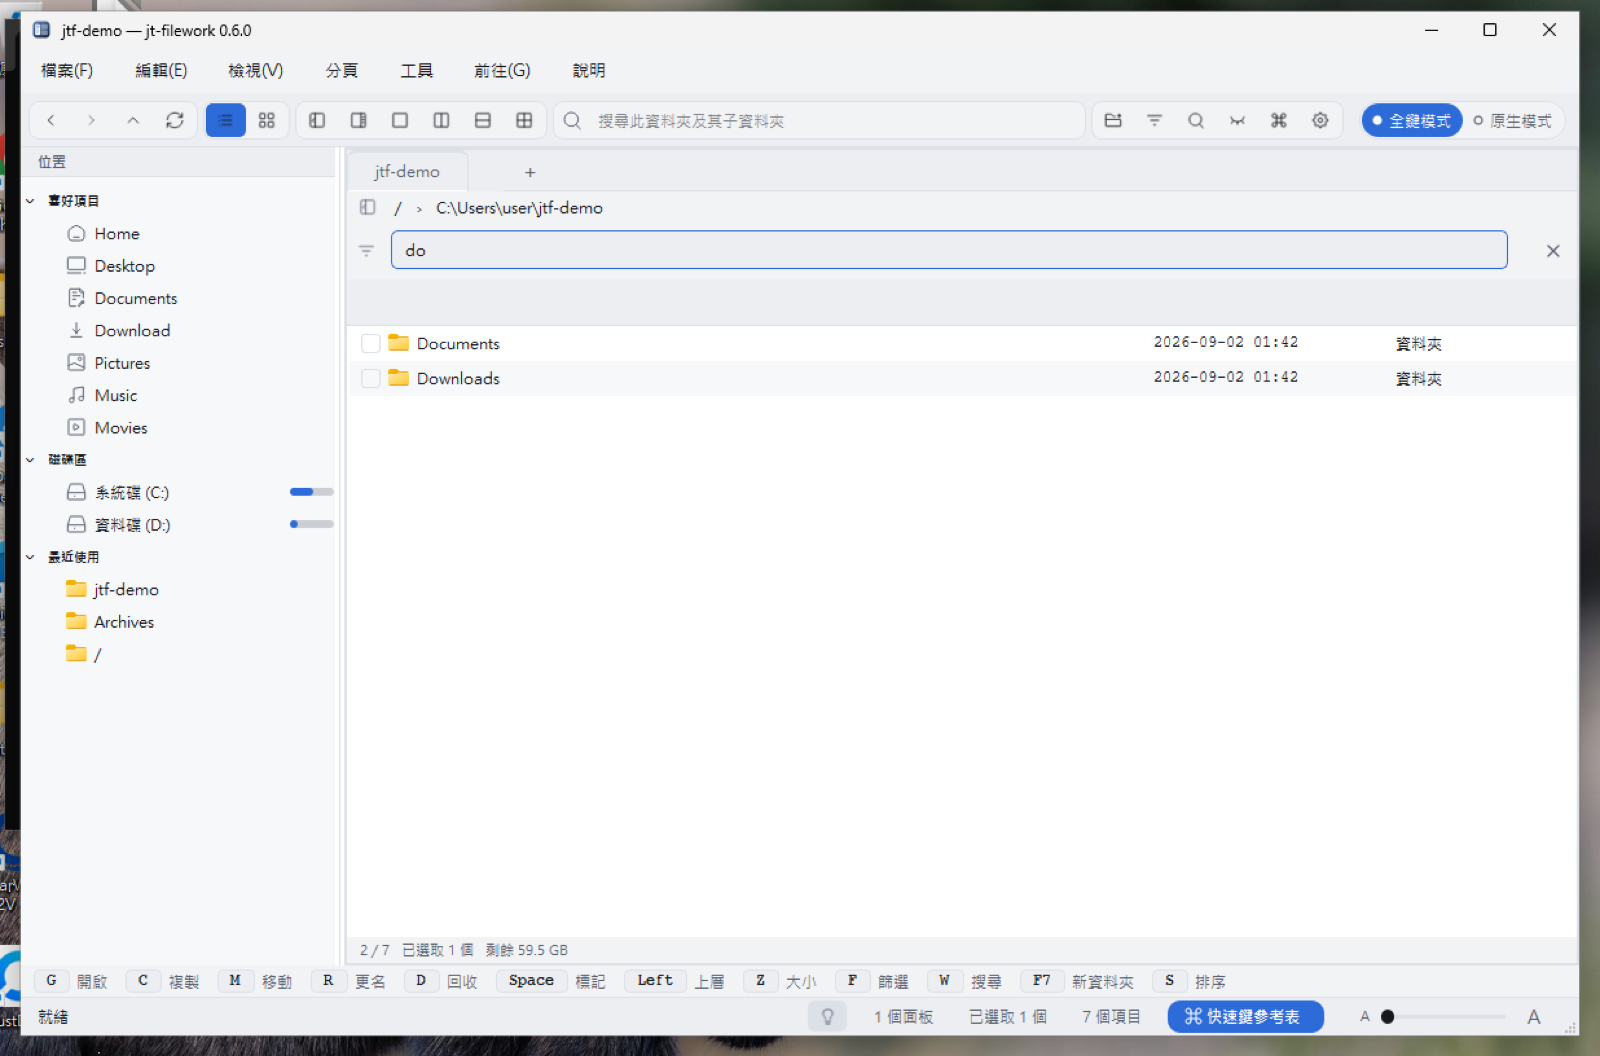
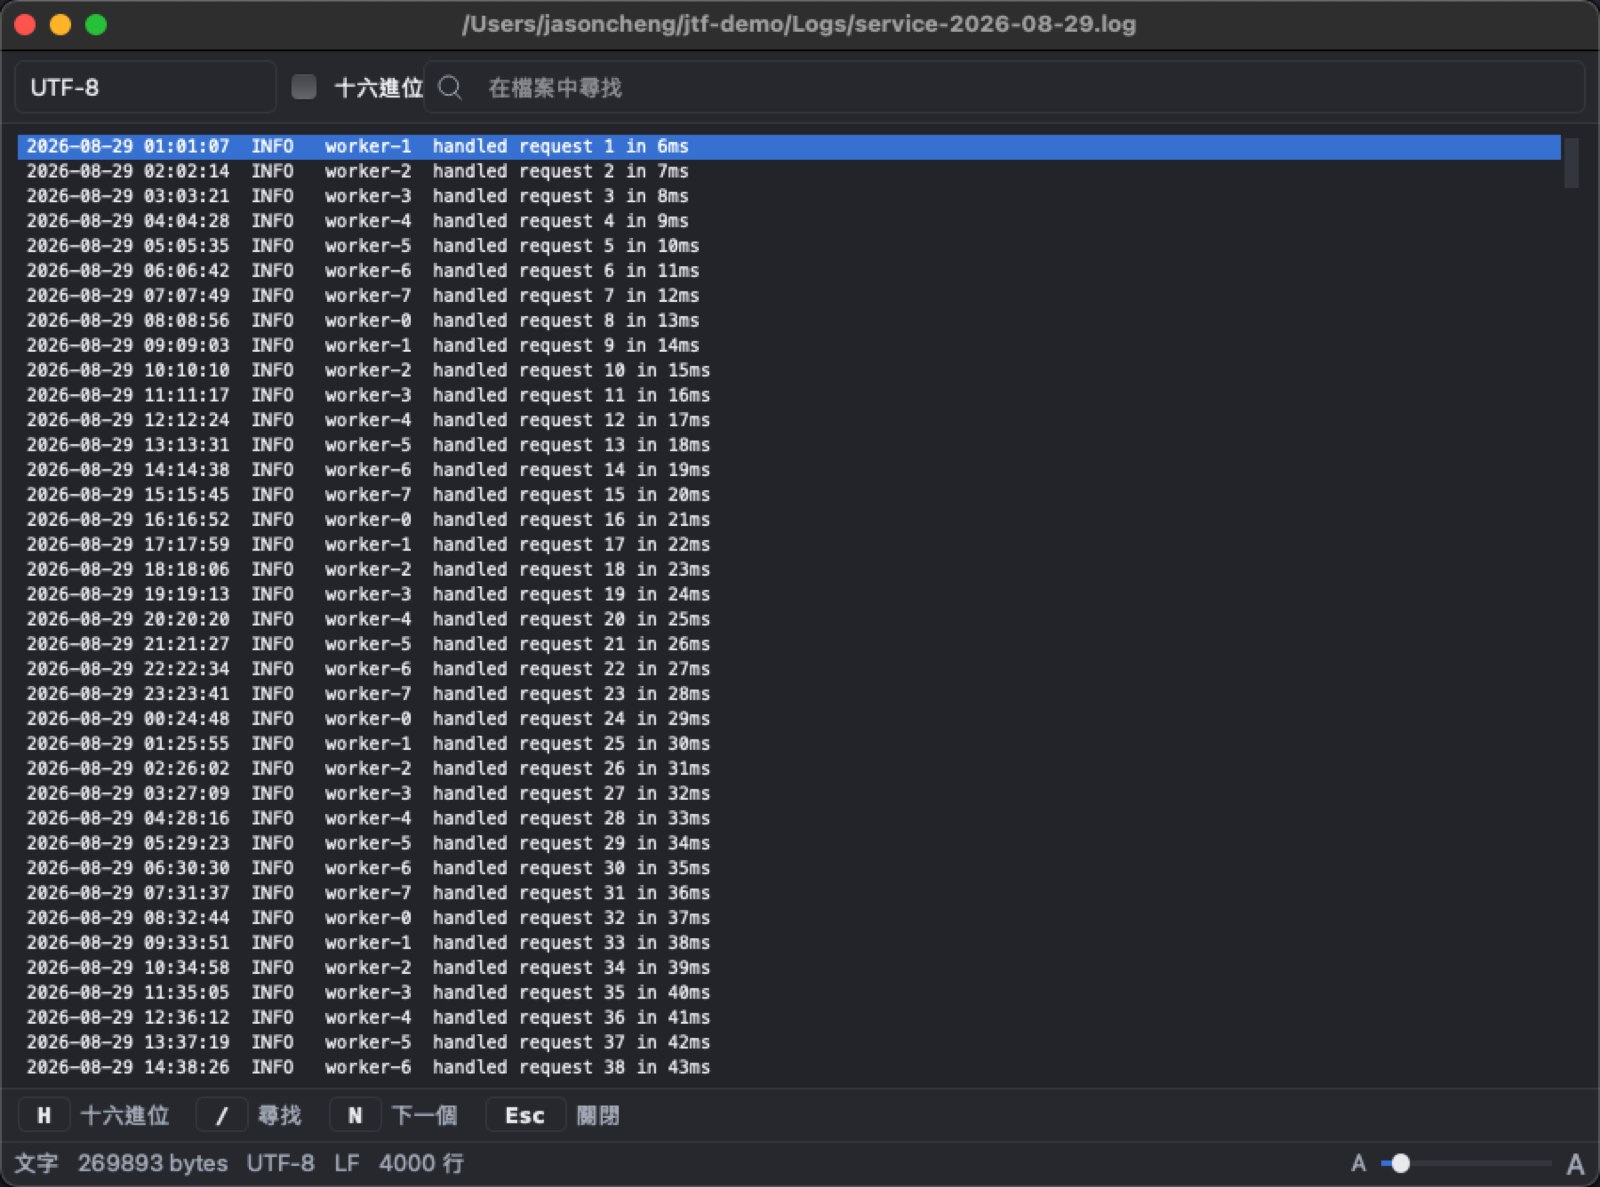
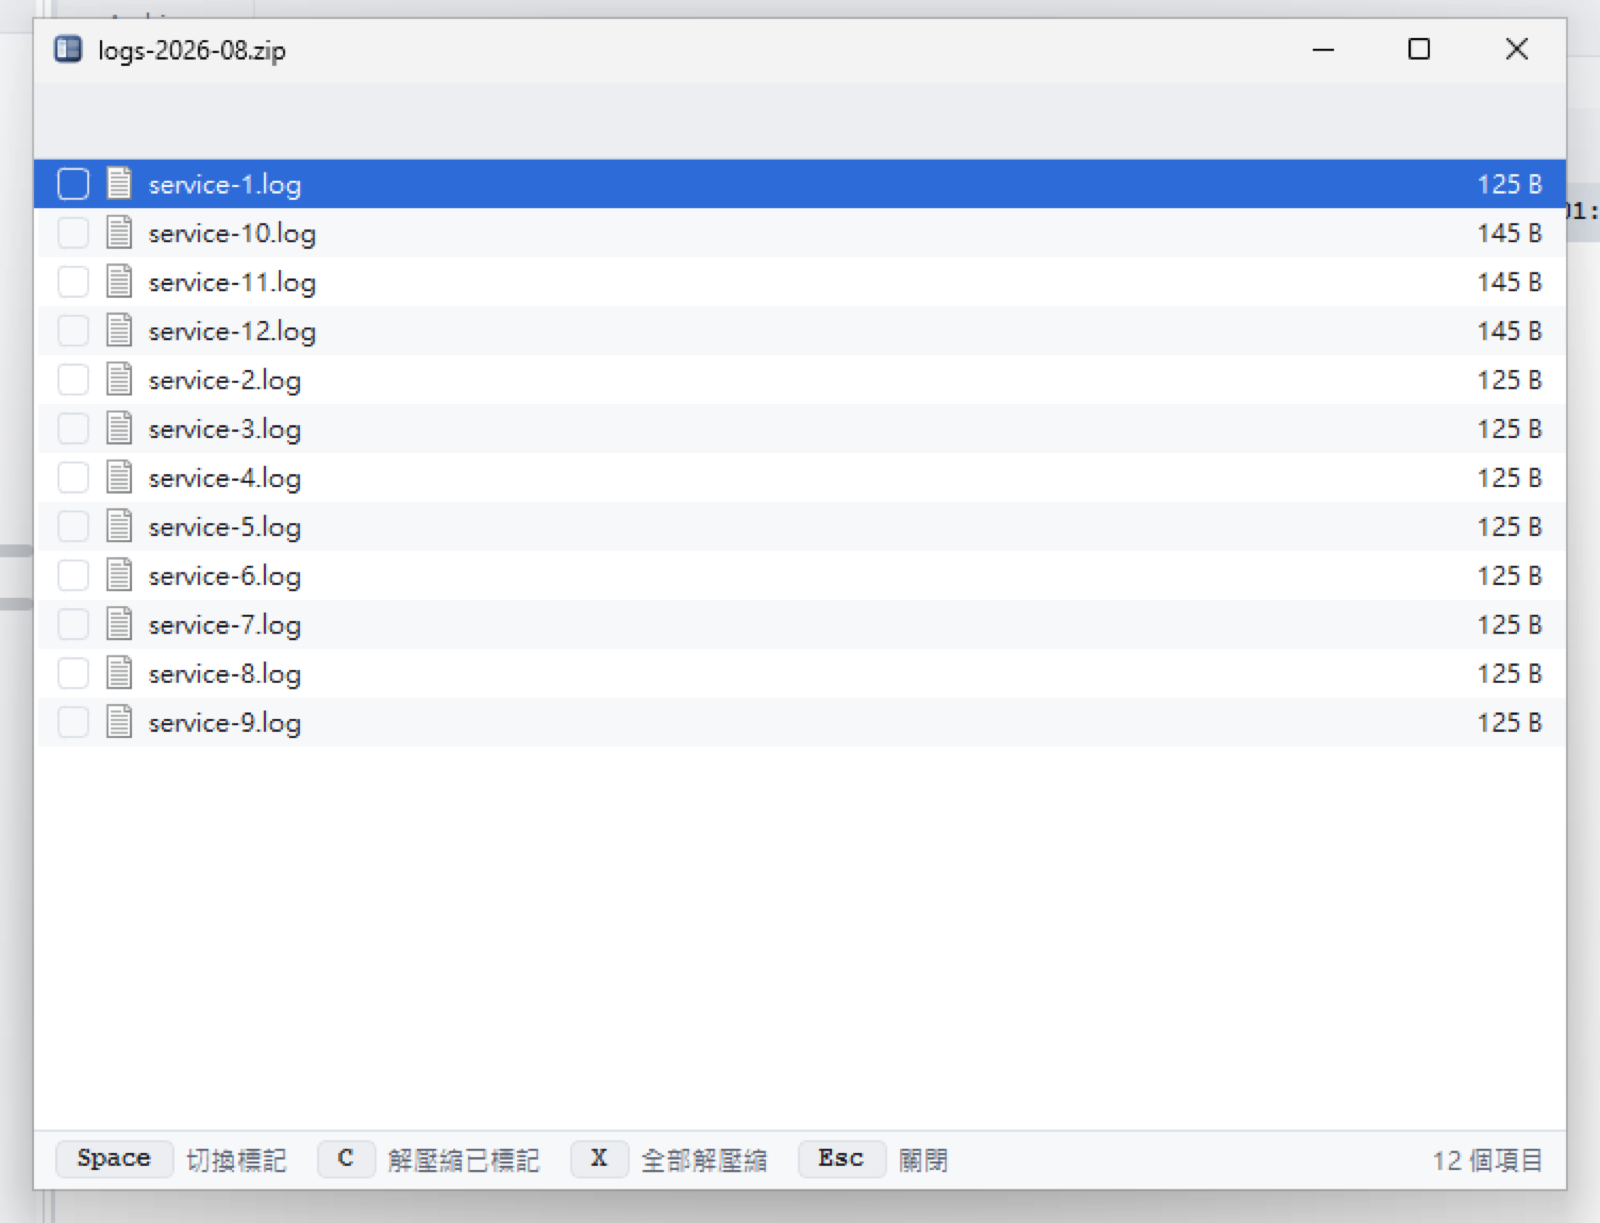
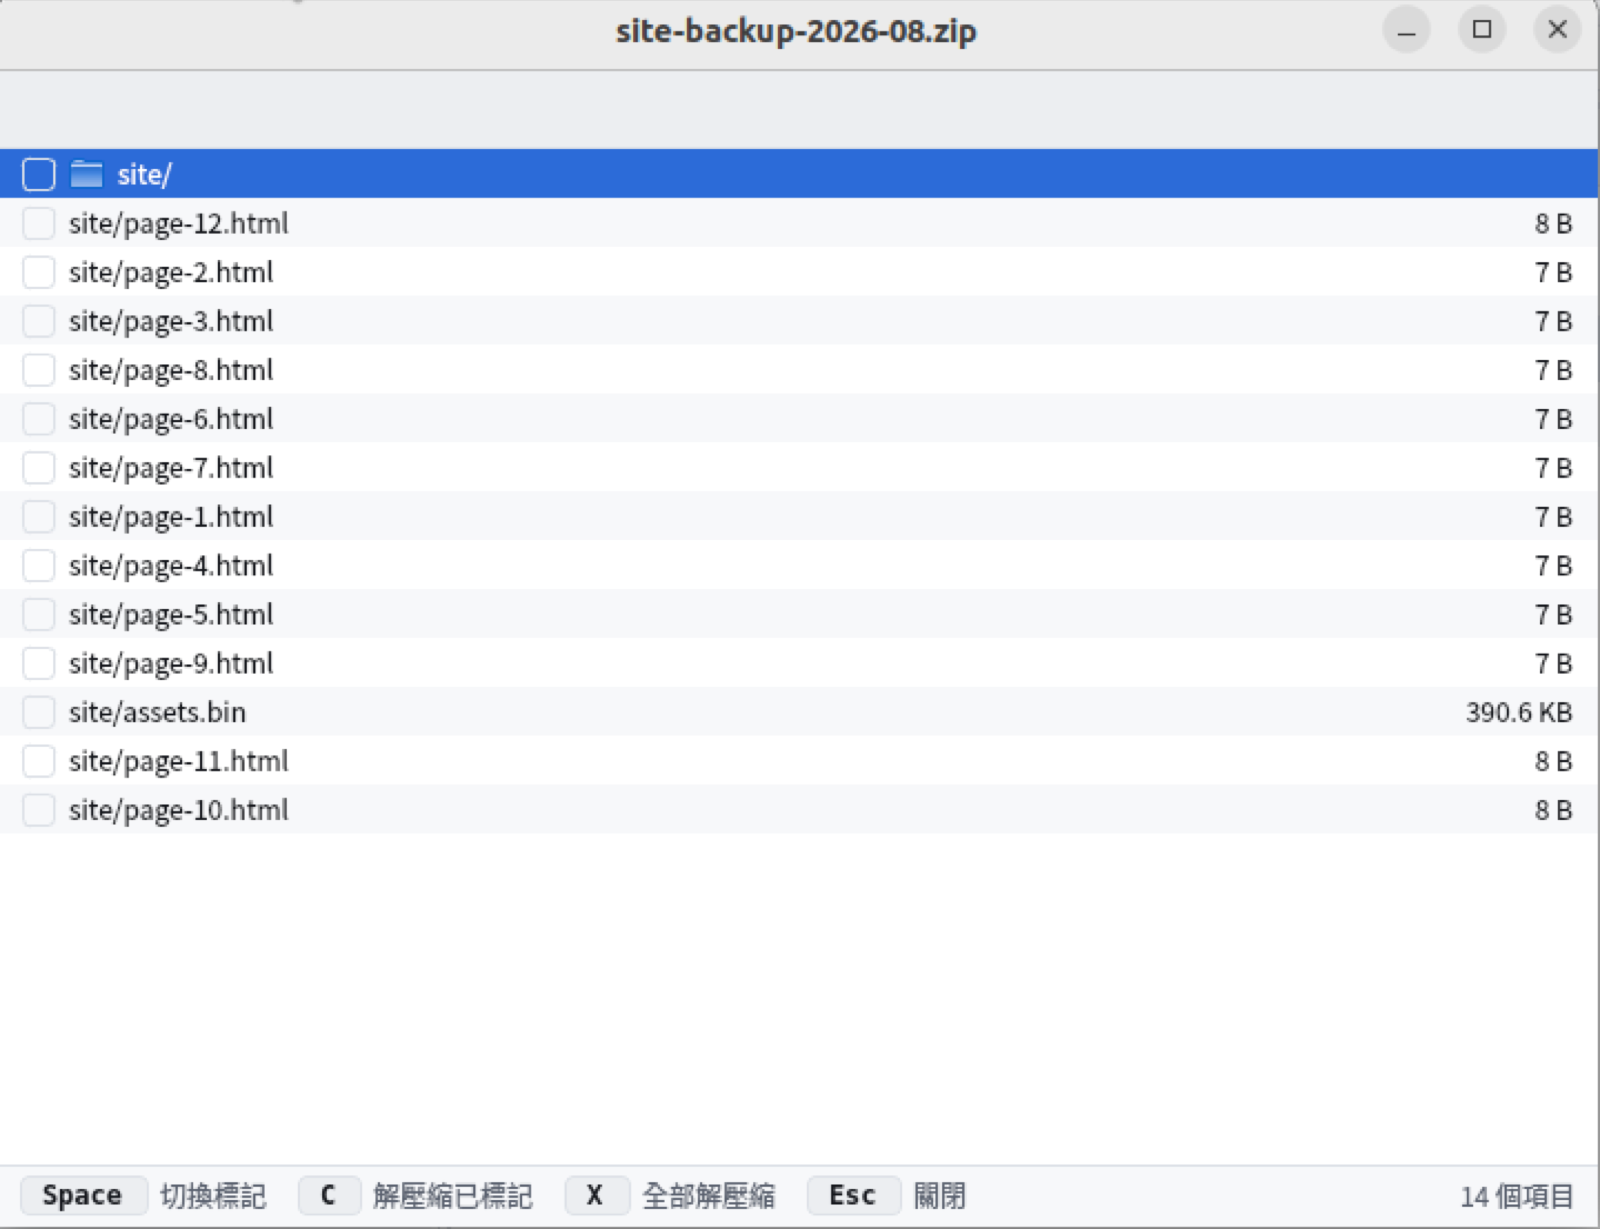
Real windows on real machines — macOS, Windows 11 and Ubuntu, the same build from the same source.
真的視窗、真的機器:macOS、Windows 11、Ubuntu,同一份原始碼建出來的同一版。
Archives and disc images
壓縮檔與映像檔
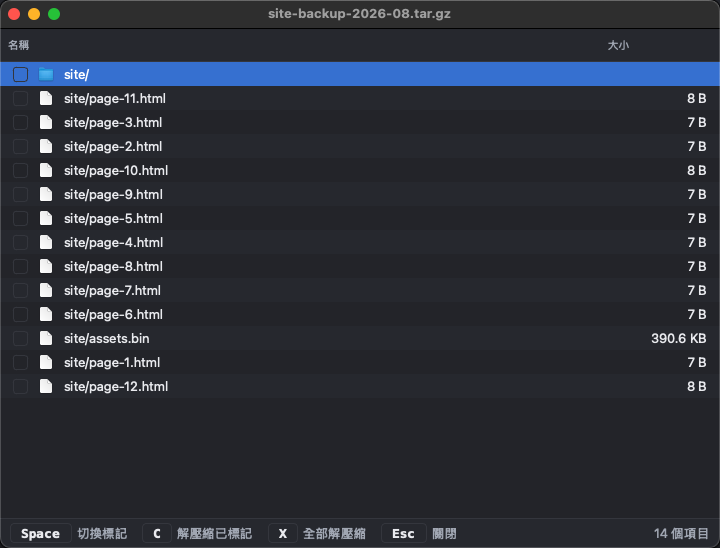
Press Enter on any of these and it opens like a folder, with the same single keys inside: Space marks, C extracts what is marked, X extracts everything.
按 Enter 就當成資料夾開啟,裡面用的還是同一組按鍵:Space 標記、C 解出標記的、X 全部解出。
| Format | 格式 | Browse | 瀏覽 | Extract | 解壓縮 | Create | 建立 |
|---|---|---|---|---|---|---|---|
| ZIP | ✓ | ✓ | ✓ | ||||
.tar, .tar.gz, .tgz | ✓ | ✓ | ✓ | ||||
.tar.bz2, .tar.xz | ✓ | ✓ | — | ||||
.gz, .bz2, .xz | ✓ | ✓ | — | ||||
| ISO 9660 (Joliet, Rock Ridge) | ✓ | ✓ | — | ||||
.7z, .rar | — | — | — |
Every reader treats what is inside
an archive as hostile.
No member escapes the folder you chose. One that would land outside it is
refused and named — never written, never quietly renamed to fit. However it is spelled:
../, an absolute path, a Windows drive letter, a UNC prefix, backslashes on any
platform.
Expansion is measured against bytes that actually arrive, not against what a
header claims — a lying header is precisely what a decompression bomb is.
壓縮檔裡的東西一律當成有問題的來看。
檔名不會跑出你選的資料夾。只要解出來會落在資料夾外面,就擋下來並告訴你是哪一個,不寫進去、也不會自己改個名字塞進去。../、絕對路徑、Windows 磁碟機代號、UNC 開頭、任何平台的反斜線,一律同樣處理。
解出來的量照實際讀到的算。不看標頭寫幾個位元組,因為標頭會騙人——那正是解壓縮炸彈的手法。
An unsupported format is not labelled as an archive this build can open, so nothing invites a press of Enter that cannot work.
不支援的格式不會被標成這版打得開的壓縮檔,所以不會有東西引誘你去按 Enter 然後發現沒用。
An .iso also goes the other
way: write it to a USB disk from the file's own context menu. Only removable
external disks are offered, the write is confirmed twice with the disk named in full, and what
was written is read back and compared before it says it is done.
.iso 也可以反過來走:在檔案上按右鍵就能寫進 USB 磁碟。清單只列可移除的外接磁碟,寫入前會確認兩次、兩次都把是哪一顆碟寫清楚,寫完還會整個讀回來比對過才說成功。
The keyboard
鍵盤
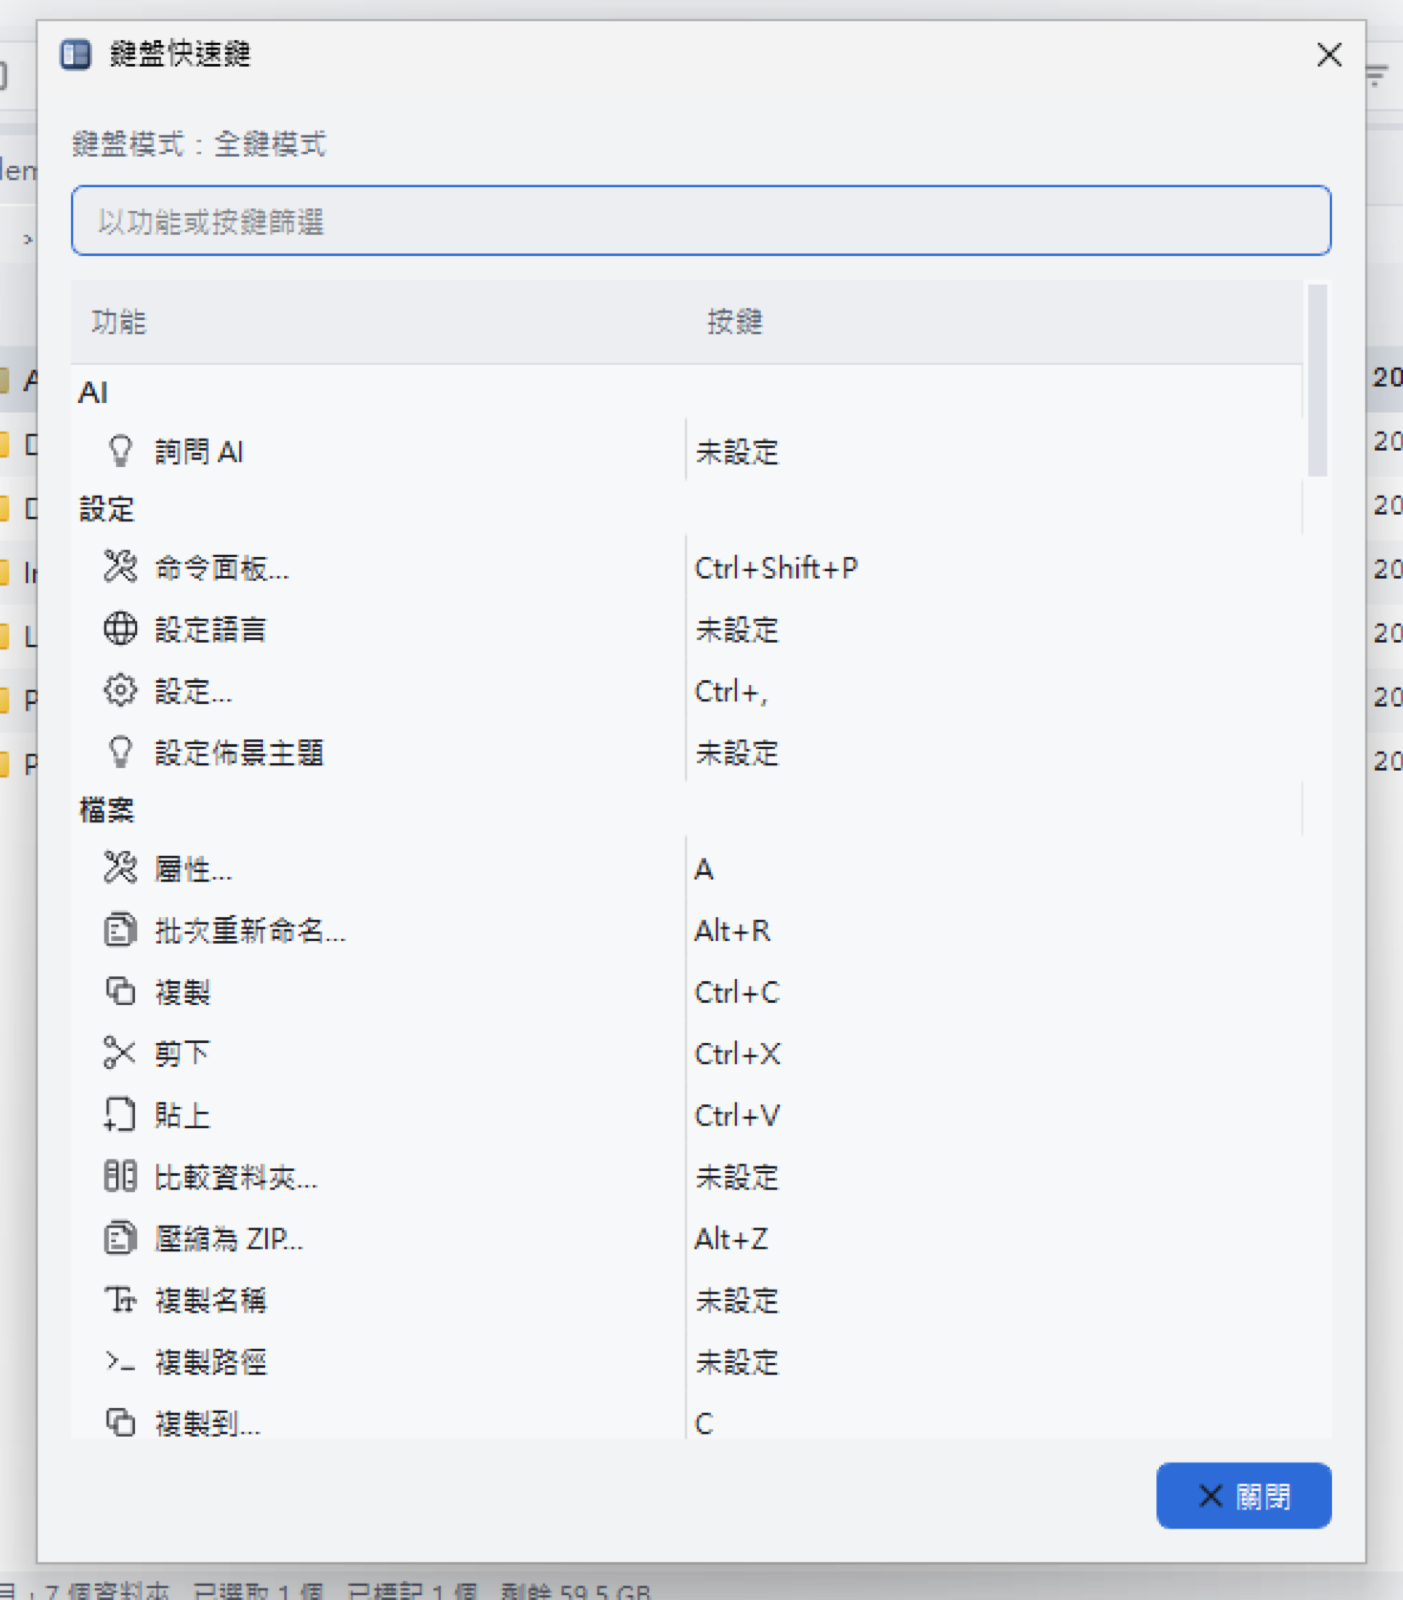
Two profiles, both data files rather than code. A binding is a line in a text file, so changing one needs no rebuild — and any of them can be changed in Settings.
兩套設定檔,都是資料檔,不是程式碼。一個綁定就是文字檔裡的一行,改了不用重新編譯,也可以直接在設定裡改。
*.pdf*.pdfA second profile follows the operating system's own conventions — the shortcuts every other application on that machine uses — for when muscle memory says ⌘C.
另一套設定檔走作業系統原生的操作鍵,也就是那台機器上每個程式都在用的那一套,給習慣按 ⌘C 的人。
Download
下載
Installers for all three platforms, built from the tagged source by the release workflow. They are not signed yet, so macOS and Windows ask once before opening them — the steps are below.
三個平台的安裝檔,由發行流程從打了 tag 的原始碼建置。目前還沒有簽章,所以 macOS 和 Windows 第一次開啟前會先問一次,步驟在下面。
macOS
Apple silicon, macOS 14 or later. A .dmg holding jt-filework.app, with Qt inside.
Apple 晶片,macOS 14 以上。內含 jt-filework.app 的 .dmg,Qt 已包在裡面。
Installing a build that is not signed
安裝未簽章的版本
jt-filework does not have an Apple Developer ID or a Windows
code-signing certificate yet, so your system cannot tell who made the file and will warn you
before opening it. That warning is the system doing its job. Before going past it, check that
the file's SHA-256 checksum matches the one in SHA256SUMS on the release page.
jt-filework 還沒有 Apple 開發者 ID,也沒有 Windows 程式碼簽章憑證,所以系統無法確認檔案是誰做的,開啟前會警告你。這個警告是系統在盡它的本分。放行之前,請先核對檔案的 SHA-256 檢查碼,和發行頁面上 SHA256SUMS 裡的是否一致。
macOS
- Open the
.dmgand drag jt-filework into Applications. - Open jt-filework from Applications. macOS says “jt-filework” Not Opened, because Apple could not verify it. Click Done.
- Open System Settings → Privacy & Security, scroll down to Security, and click Open Anyway beside the line about jt-filework.
- Confirm with your password or Touch ID, and choose Open Anyway if macOS asks once more.
- 開啟
.dmg,把 jt-filework 拖進「應用程式」。 - 從「應用程式」開啟 jt-filework。macOS 會顯示「未打開「jt-filework」」,因為 Apple 無法驗證它。按「完成」。
- 開啟「系統設定 → 隱私權與安全性」,往下捲到「安全性」,在關於 jt-filework 的那一行旁邊按「強制打開」。
- 用密碼或 Touch ID 確認;如果 macOS 再問一次,選「強制打開」。
This is needed once. Do not turn Gatekeeper off, and do not run commands that remove the quarantine attribute from files in general.
只需要做一次。請不要關閉 Gatekeeper,也不要執行那種會把所有檔案的隔離屬性一併移除的指令。
Windows
- If the browser says the file is not commonly downloaded, choose to keep it.
- Open the
.msi. SmartScreen shows Windows protected your PC: click More info, check that the file name is the one you downloaded, then Run anyway. - Allow the installer to make changes when Windows asks, and follow it through. jt-filework is then in the Start menu.
- 如果瀏覽器說這個檔案不常被下載,選擇保留。
- 開啟
.msi。SmartScreen 會顯示「Windows 已保護您的電腦」:按「其他資訊」,確認檔名是你下載的那一個,再按「仍要執行」。 - Windows 詢問是否允許安裝程式變更裝置時選「是」,照著安裝程式走完。之後 jt-filework 就在開始功能表裡。
The .zip needs no
installing: unpack it and run jt-filework.exe, and SmartScreen asks the same question
the first time. Do not turn SmartScreen off.
.zip 不用安裝:解壓縮後執行 jt-filework.exe,第一次執行時 SmartScreen 會問同樣的問題。請不要關閉 SmartScreen。
Debian and Ubuntu
Debian、Ubuntu
sudo apt install ./jt-filework_<version>_amd64.debThere is no warning to get past; apt installs the Qt libraries it needs.
沒有需要放行的警告;apt 會一併裝好需要的 Qt 函式庫。
Building
建置
Rust 1.98 (pinned by rust-toolchain.toml) and Qt 6.
Build output goes outside the source tree.
Rust 1.98(rust-toolchain.toml 有釘住)跟 Qt 6。建置輸出丟在原始碼樹外面。
macOS
brew install qt cmake
./src/ui/qt6/build.sh release
Linux
sudo apt install build-essential cmake ninja-build pkg-config \
     qt6-base-dev libqt6svg6-dev libgl1-mesa-dev
./src/ui/qt6/build.sh release
Build on the oldest distribution you intend to support: glibc's compatibility runs one way, so a binary built on Ubuntu 22.04 runs on 24.04 and not the reverse. Following the desktop's light/dark setting while running needs Qt 6.5 or newer; on 22.04's Qt 6.2 the theme is read once at launch.
要支援到哪個最舊的發行版,就在那台上面建置。glibc 只往上相容:22.04 編出來的可以在 24.04 上跑,反過來不行。執行中跟著桌面切深淺色要 Qt 6.5 以上,22.04 的 Qt 6.2 只在啟動時看一次。
Windows
MSVC Build Tools, CMake, Qt 6 and
NASM — aws-lc-sys, which arrives through the SFTP stack,
assembles its own primitives. The full runbook is in
docs/DEVELOPMENT_ENVIRONMENT.md.
MSVC Build Tools、CMake、Qt 6,還要 NASM。aws-lc-sys 是跟著 SFTP 進來的相依,它在 Windows 上要自己組譯。完整步驟看 docs/DEVELOPMENT_ENVIRONMENT.md。
Not built yet
尚未完成
Named here rather than left to be discovered.
先講清楚,不要讓人自己踩到才知道。
- On a server: viewing or previewing a file, renaming, making a folder, copying from one server to another, and more than one server at a time. Copy, move and delete between a server and this machine work.
.7zand.rar.- Searching inside files. Search matches names, paths, types, sizes and dates.
- The Recycle Bin on Windows. Shift-Del deletes permanently instead.
- Reveal in file manager, eject, external editor, Open With and Share on Windows and Linux. Those commands are greyed out rather than hidden; Quick Look opens the built-in viewer instead.
- Running a typed command over every marked file.
- 伺服器上的:檢視或預覽檔案、更名、新增資料夾、伺服器對伺服器的複製,以及同時連多台伺服器。伺服器跟本機之間的複製、移動、刪除已經可以用。
.7z與.rar。- 搜尋檔案內容。搜尋比對的是檔名、路徑、類型、大小和日期。
- Windows 的資源回收筒。請改用 Shift-Del 永久刪除。
- Windows 跟 Linux 上的「在檔案管理員中顯示」、退出磁碟、外部編輯器、「開啟檔案的應用程式」和分享。這些命令會呈灰色而不是隱藏;快速查看則改開內建檢視器。
- 對所有標記的檔案跑自訂命令。